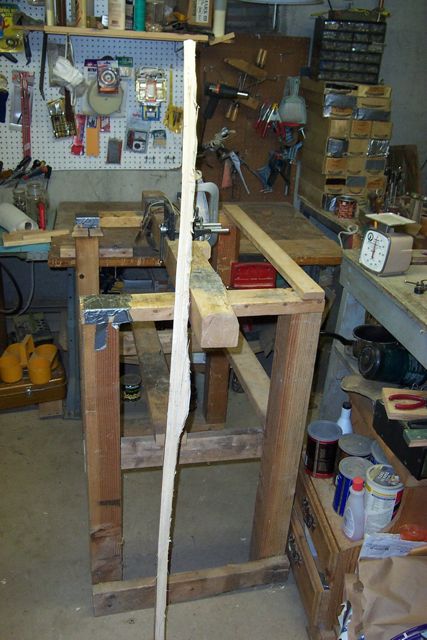
I did the layout and trimmed up the sides. Here is the picture of the way I find the center line. It's sash cord which will later be used for the long tillering string. 2 clamps on either end. Try to arrange the string so that it falls on the handle area. Keep in mind that you must follow the vertical grain with your center line. Not that important with most hickory staves but it was with this one just a bit on one end. I had to deviate from the center line just a little to do that.
This picture shows handle lay out. Check my site for an alternative styles.I will be making a rigid handle bow. About 7.5 inches of the bow will not be bending. This style is the one I like. Got it from Al Herrin's Cherokee Bows and Arrows. Find the center of the stave. Measure up 1.25 inches for the arrow pass. Measure down 4 inches for a 4 inch handle. The fade or dip on the lower limb is about an inch. Measure to the tip of the stave and get the working limb length. Measure the same distance down from the tip to the fade on the upper limb for the working limb. Upper fade is about 2.5 inches. This handle makes a nice sweet shooter-balanced in the hand.
In the last pic, the center line is 3rd from the left. Next pic shows the stave with the center line drawn making an attempt top follow the grain.
In the last pic the center line is 3rd from the left. Next pic shows the stave with the center line drawn making an attempt top follow the grain.
I leave the knocks full width until I string the bow for the first time. I'll also be leaving the handle full width until that time. This style of bow is sort of a Mear Heath type-full width until just past mid limb tapering to 1/2 in knocks eventually; leaving the knocks a bit wider will allow me to cut one side a bit deeper to bring the string on the handle a bit more. You may have noticed the string is not centered but this is not a problem 'cause it will fall somewhere on the handle. Obviously to do a 3/4 in nock measure 3/8 in on either side of the line.
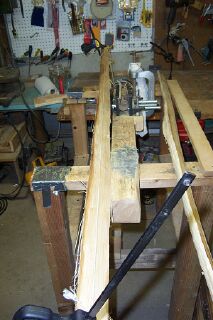
Last pic shows the trimmed up stave. Right to the lines. Makes sense to stay just a tad outside the line but...Work was done with a draw knife.
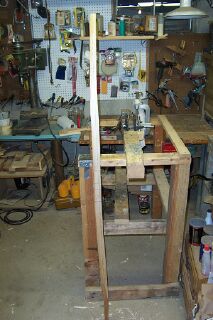
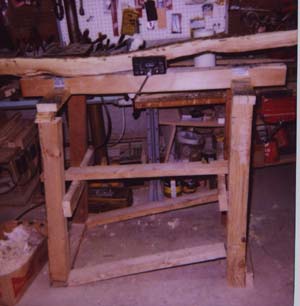
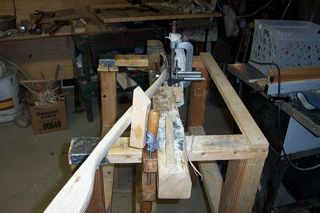
You'll need a way to secure the bow as yo work on it. Here's the way I do it.
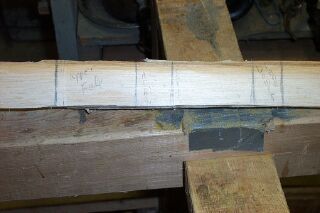
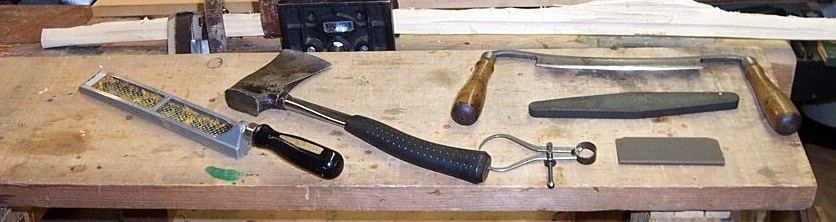
Please note the bow is clamped in the vice and strapped in tight with a belt.You'll need some hand tools. Left to right. Stanley Shurform- I love it. Hatchet-we are past that stage but I used it in roughing out the belly. Draw knife-I keep it sharp. I hone at the end of each day. Hone the back and front but on the back keep the stone flat. Stones-for sharpening. Progress from coarse to med. and to fine as needed. Calipers-we have layed out the fades and the handle previously. Now with the calipers I'll start measuring just past the fades. I want to start the floor tillering at 3/4 to 7/8 of an inch thickness just past the fades. Time to start thinking about handle thickness. I like 1.5 inches about. Makes it easier to negotiate the transition from fades to limb. Here's a great way to use the calipers for a straight and particularly for a twisty stave. Measure off 6 inch intervals on your stave. Starting at 7/8 of an inch for a thickness just past the fades. Give the calipers a twist or 2. At the next 6 in. interval the calipers should just fit. Remove wood accordingly and continue. Having said that I rarely use the calipers in that fashion anymore. I build by eye. Time to floor tiller. Newcomers should practice with the draw knife on a sapling. By the way saplings make good bows. Keeping the knife flat on the work allows for thin shavings to be cut while steeper angles of the knife make for a quicker wood removal. Easy does it. You can cut a stave in half with 1 swipe of a sharp draw knife.
Sooner rather than later you should switch to a tool such as the Shurform that removes wood a bit more slowly.
Most of the time you want to take long sweeping strokes with your floor tillering tool. This helps to avoid hinging or areas where the stave is bending too much in relation to surrounding areas. Aim for an elliptical bend on this type of a bow-think of a satellite dish; mark where wood needs to be removed. Remember the bend needs to start where the dips end an increase as you head towards the tips with the last few inches not bending. Go slowly take a few sweeps with the tool and floor tiller. Exercise the stave 20 or so times as you floor tiller. Ok the bottom limb is done for now. Floor tillered. Get the other limb working. Then long string tiller using a rope in pulley system which is described in Bow Making Directions.
First, you will have to cut in some knocks. Remember I left both knocks wide because that's what I always do! Allows me to adjust he string on the handle later. Will explain when I get to it. To cut the temp knocks (we'll narrow them later)-make sure tips of stave are square; measure down 1/2 in, draw line, draw a line at 3/4 inch; draw a diagonal line the right way-lol-, make a pilot cut with hacksaw, widen with chain saw file to about 3/8 in. Why do I make my knocks 1/2 inch only? I do so because I don't want to waste limb on the nock area. That simple. Also please refer to Bowyer Directions on my site.
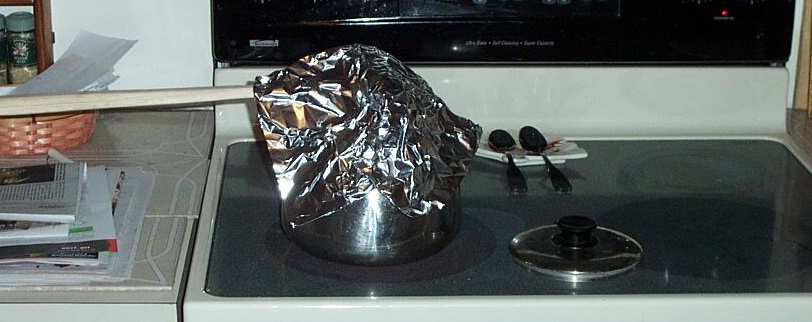
Decided to steam in a reflex on the tips of the upper and lower limbs. Here's the steamer. Just a tea pot. Going for 30 mins to 1 hr. I found that the reflex held better though when I used dry heat. I use a hardware store heat gun. Just keep it moving so as not to scorch the wood. Also a good idea to grease up the area to be heated.
Stave has been steamed for 1 hr confining the steaming to the tip area. Bow tip is in the vice. A Jorgensen clamp and a block of 2 of wood gives me the amount of bend I need. Description of the bench is on my site. As mentioned you may also use dry heat.
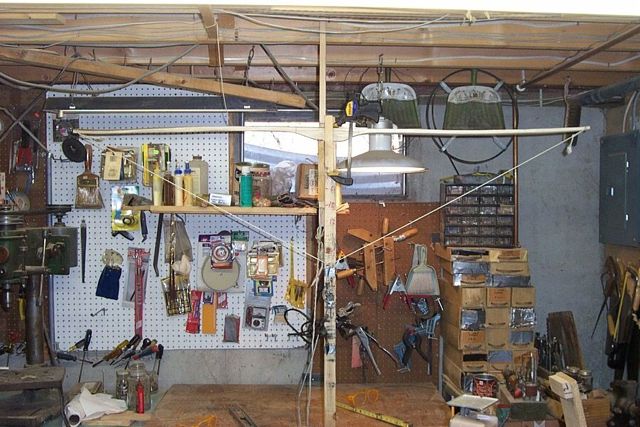
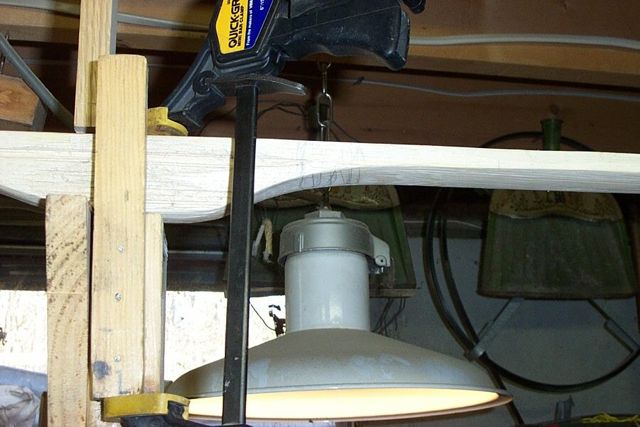
A dryer comes in handy either to dry a stave to ready it for building or to finish dry after steaming.or toHere's the dryer. Simple to make. There's 75 watt light at the bottom. One of those movable shop lamps. I hang the stave with a cord about 1 foot above the lamp. Hang it securely. I had one slip down and burn when it touched the lamp. I don't leave it on at night and I never leave the house with it on. It's good enough for me because I seldom dry wood. If you use it be careful. BTW switch the stave around so the other side dries too. The paper shopping bag at the bottom is only there so I could take the pic.

When she's dry at 6-10% then it is time to long string tiller. I'll use my Hanson Hand Held Bowscale (which is available from many archery suppliers), sash cord-about 10" longer than the bow-rope and pulley, and then my Shurform. Make 2 double loops at each end of the cord. Keep it simple and let's do it. Here's the profile.
Here is the stave on he rope and pulley with the long string attached on the knocks. Masking tape is placed on 2x 4; shows the start. Measure 10 in down. That's the end. Aim for good curvature of the limbs starting at the fades end and increasing elliptically outward.
Mark the places where wood removal is needed. Note the wood clamp to keep the bow secure. I really want the wood to move there and spend lots of time working at the fades.
When the limbs are bending well starting at the fades and increasing outward, long string tillering is done. It is very important to reduce the weight of the stave down enough so that you obtain target weight at 10 inches of string travel as I have shown. If the stave is too heavy and you string it for the first time it may break. Been there and done that in the early days. Some bowyers-those that use osage in particular can do that step at the floor tillering stage. This is the way I do it. I have developed this method of checking weight because bows were too heavy and breaking on me at their initial stringing. I attach the bow scale and pull on the rope. The weight registers and stays on the scale which is why I like this one. I'm going to shape the knocks to fit my bow stringer. Going to use the 4 way file to do that. If you remember we left the tips pretty wide and the handle wide. Lucky thing. I braced the bow at a very low brace height and the string is off the handle. I can now cut the knocks deeper on the offending side and bring the bow string on the handle. Actually, did but may have to go deeper I use a 12-14 strand B50 Dacron string. No need to be heavier. This bow may come out a bit under weight. I'm shooting for 50-55#. Really should have been wider. But one works with what one has.
Finish the long string tillering and string the stave with a bow stringer. Prior to the first stringing get the back glassy. I remove all marks with a pen knife held at right angles to the work. Then I sand the back with 100 grit and then 220 grit paper. The first bracing for me is at 3 inches or so. As I tiller getting the limbs to bend evenly is important. I had a hard time doing that with this one. Anyway I don't increase brace height until the limbs are bending well. As I approach full draw say around 18 inches I start to twist the Flemsh string a bit tighter and get it to fletch clearing distance. That's where I start tuning the bow. Then I work on shaping the handle. I use water based stain and 6 coats of polyacrylic usually but I did a different finish on this bow giving it a coat or 2 of Rustoleum Klear Kote
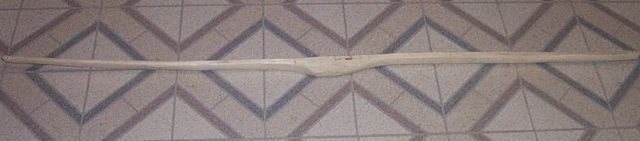
This bow came in around 50# 26 inches of draw- with a shade under 2 inches of set. Refer to my web site for tillering directions as I pretty much tiller the same way each time.
