There is just something special about making your own arrows. Perhaps you want to make arrows from shafts crafted with your own hands. You can buy your arrow shafts from an archery dealer if you would rather. These traditional archery sites have sponsors. Patronizing them would help keep these sites on line.
If you have made or intend to make your own shafts.
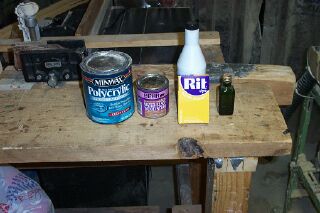
Pine Shaft Hints may be found elsewhere on this site. If you buy the shafts from a dealer, or even if you make them yourself check them for straightness. Sometimes shafts need to be straightened. Hand straightening usually suffices. Simply flex the shaft in the other direction as you site down its length. If the shafts are really crooked you may have to heat them over a stove and then hand straighten them. I use our kitchen range. Another technique is to burnish the shaft with a smooth stone or round bottle. I rest one end of the shaft on my lap, bend it slightly in the opposite direction from the bend and burnish it by rubbing the stone over the shaft .Burnishing must be done after staining or the stain will not penetrate the wood.
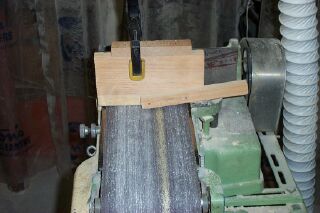
The next step is to examine the end grain and cut the self nock. Selfnock Hints may be found elsewhere on this site. The archer may wish to buy plastc nocks and attach them to the shaft with Duco. Some archers use a taperring tool which is available from dealers. I prefer to use my belt sander with a jig I made to fit over its fence. The point taper is 5 degrees while tthe nock taper is 11 degrees. Remember to wrap the selnock with thread or artificial sinewn set in glue to keep the nock from splitting on release. Examine the shaft and unless the board from which it came was milled perfectly parallel to the grain then there will be a series of rifts going one way on one side of the shaft and the other way on the other side of the shaft. Mark the rift so that when you glue on the nock or cut the selfnock the rifts are pointing away from you when the arrow is in shooting position. This is for safety in case the arrow breaks it will break away from your hand.
The spine or stiffness of the shaft is absolutely crucial. Improperly spined arrows will not shoot well. Selfbow car and tuning may be found elsewhere on this site. Shafts you made yourself may be flexed and spined by hand or a spine tester may be purchased. Once the arrow is fletched the proper spine may be achieved by "shooting the arrow in." See Shoot Arrows.
Dealer bought shafts come in 5# groups such as 40-45# for example. Some dealers sell shafts of 12 in different spine classes to help the archer tune the bow.
I wipe on waterbased stain or Rit Dye mixed with alcohol write after tapering the nock and point. If you are using plastic nocks, stain first and then glue on the nock. Take care to align the nock perfectly to the shaft and remember that the groove must be at right angles to the end grain of the shaft.
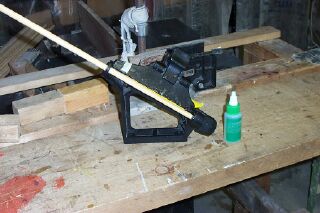
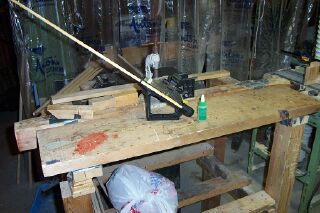
I use Duco and an inexpensive fletching jig to fletch the arrow or to attach the feathers. Turkey feathers may be bought from dealers. I use turkery feathers of 2 colors per arrow. The cock feather, which is the one lying at right angles to the nock groove, is the first one to be fletched. The 2 hen feathers are the same color but different from the cock feather. I skive the leading edges of each of the 3 feathers with a pen knife to smooth them out. If you built a self nock now is the time to wrap it with artificaial sinew, silk or nylon thread. I also, on ocassion, wind strands of artificial sinew around the fletching which helps to keep the feathers attached to the shaft. You may buy a feather burner or ch a chopper or trim the feathers by hand as I do with a scissors. I just like the way they look!
I fletch the cock feather first..
Fletch the 2 hen feathers.
Fletchng is done.
Here's my favorite template. I trim the back and just begin to trim the rest, remove the template and complete the trimming.
The next step for me in the makng of the arrow is to give it 1 coat of polyacrylic. I brush it on right in between the fleching and coat the entire arrow. I feel the bond between shaft and vane is stronger without a barrier of polyacrylic.
Cresting is optional. You may buy a crester, rig one up with a hand drill or crest by hand. I use hobby type acrylic paints. I mark the shafts with a pencil befoe cresting.
When the paint dries I brush on 2 more coats of polyacrylic.
The final step is the insallation off the points. You will want to buy points that match your shaft diameter. Typical diameters are 5/16, 11/32 and 23/64 inches. For target shooting I use field points. You will need to taper the point end of the shaft to a 5 degree taper. You may buy a taper tool from a dealer. I made my own using the fence on my shop beltsander. If you intend to use plastic nocks you will need another jig to cut the 11 degree nock taper. They are easy to make with a bit of ingenuity.
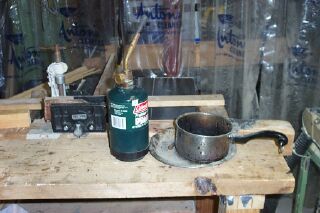
To install the points I heat hardware store hot melt glue sticks in an old pot. I buy the best grade of glue. I coat the tip with a bit off hot melt, heat the point in a propane torch and attach it to the shaft. I slight turn shows if it is attached properly. I dip the point and shaft in a glass of water to cool it.
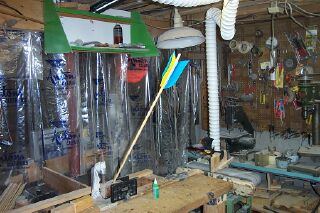
Here are the finished handplaned, barrel chested, pine arrows. Note the artificial sinew wrappings.
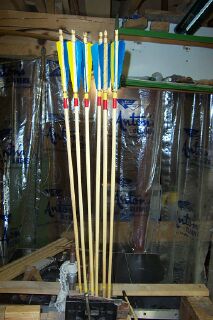
That's it. You have made your own arrows. Enjoy.
Copyright 2004 George C Tsoukalas
